If your Hoover vacuum cleaner is not working, you’re in the right place. Here we will help you identify the issue your Hoover vacuum has. . .
Table of Contents
Hoover Vacuum Cleaner Power Button Not Working – Why and How To Fix
If the power button off your Hoover vacuum cleaner isn’t working, the problem could be that it has gone bad. To solve the problem you will need to replace the power button. Follow the steps below to replace the power button of a Hoover windtunnel 2 rewind bagless upright vacuum cleaner . . . .
How to replace the power button of a Hoover windtunnel 2 rewind bagless upright vacuum cleaner
Here’s how to replace the power button of your Hoover windtunnel 2 rewind bagless upright vacuum cleaner . . . .
Step 1. Ensure that your machine is turned off and unplugged from the power outlet before you begin the replacement process. Replacing any part of your Hoover windtunnel 2 rewind bagless upright vacuum cleaner when the machine is turned on or plugged into the power outlet can cause electrocution.
Step 2. Disconnect the hose from the vacuum cleaner and then set it aside.
Step 3. Take the extra accessories out of the side of the vacuum cleaner. Set the extra attachments aside.
Step 4. Press the button on the handle of the vacuum canister to disconnect it from the vacuum cleaner.
Step 5. Take the vacuum canister out of the vacuum cleaner. Set the vacuum canister aside.
Step 6. Remove the screw on the top handle of the vacuum cleaner to disconnect it from the rest of the vacuum cleaner. Keep the screw in a safe place.
Step 7. Take the top handle out of the vacuum cleaner and then set it aside.
Step 8. Get a screwdriver and then use it to take out the screws holding the panel in place. Keep the screws in a safe place.
Step 9. Take the back panel out of the vacuum cleaner and then disconnect the wires holding it in place. Set the rest of the vacuum cleaner aside.
Step 10. Unhook the tabs holding the power button in place to disconnect it from the back panel of the vacuum cleaner. Take the old power button out of the vacuum cleaner and then set it aside.
Step 11. Get a new Hoover windtunnel vacuum cleaner power button and then put it in the place of the old one and make sure to lock it in place properly.
Step 12. Reconnect the wires that you disconnected from the vacuum cleaner earlier.
Step 13. Reconnect the back panel to the vacuum cleaner and then use the screws that you disconnected earlier to lock it in place properly.
Step 14. Reconnect the top handle to the vacuum cleaner and then use the screw that you removed earlier to lock it in place properly.
Step 15. Reconnect the vacuum canister to the vacuum cleaner and make sure to lock it in place properly.
Step 16. Reconnect the vacuum hose to the vacuum cleaner and make sure to lock it in place properly.
Step 17. Check if the power button is working like it is supposed to now.
Hoover Vacuum Cleaner Suction Not Working – Why And How To Fix
If your Hoover vacuum cleaner isn’t picking up dirt properly, the machine could have one of three problems. Keep on reading to figure out and to solve the problem your Hoover vacuum cleaner has . . .
The filters are clogged
If the filters of your Hoover vacuum cleaner are clogged, the machine won’t be able to pick up dirt properly. To solve the problem, you will need to clean the filters. Here’s how to clean the filters of different kinds of Hoover vacuum cleaners.
After cleaning the filter of your Hoover vacuum cleaner, turn the machine back on and then check if it is working like it is supposed to now.
The vacuum hose it clogged
If the hose of your Hoover vacuum cleaner is clogged, the machine won’t be able to pick up dirt properly. To solve the problem, you will indeed clean the vacuum hose. Here’s how to clean the hose of your Hoover vacuum cleaner
After cleaning the hose of your Hoover vacuum cleaner, turn the machine back on and then check if it is working like it is supposed to.
The brush roller is clogged
If the brush roller of your Hoover vacuum cleaner is clogged, the machine won’t be able to pick up dirt properly. To solve the problem, you will need to clean the brush roller. Follow the steps below to clean the brush roller of two different kinds of Hoolver vacuum cleaners . . .
How to clean the brush roller of a Hoover air steerable vacuum cleaner
Follow the steps below to clean the brush roller of your Hoover air steerable vacuum cleaner . . .
Step 1. Make sure your vacuum cleaner is turned off and unplugged from the power outlet before you begin the cleaning process. Cleaning any part of your Hoover air steerable vacuum cleaner is turned on or plugged into the power outlet can cause electrocution.
Step 2. Flip the vacuum cleaner to gain access to the brush roller.
Step 3. Get a screwdriver and then use it to take out the three screws at the bottom of the vacuum cleaner holding the brush roller cover in place. Keep the screws in a safe place.
Step 4. Take the brush roller cover out of the vacuum cleaner and then set it aside.
Step 5. Take the brush roller out of the vacuum cleaner and then slide it through the vacuum belt. Set the rest of your vacuum cleaner aside.
Step 6. Get a pair of scissors and then use it to carefully cut off any hair or thread that may be stuck on the brush roller. Take the hair or thread out of the brush roller and then throw it away.
Step 7. If necessary, wipe the internal part of the brush roller chamber with a dry piece of cloth or tissue. Wipe the brush roller cover as well.
Step 8. When it is completely clean, reconnect the brush roller to the brush head attachment and then slide it through the vacuum belt.
Step 9. Reconnect the brush roller cover to the vacuum cleaner and then use the screws that you removed earlier to lock it in place properly.
Step 10. Flip the vacuum cleaner over again and keep it in the upright position.
Step 11. Turn your Hoover air steerable vacuum cleaner back on and then check if it is working like it is supposed to now.
How to clean the brush roller of a Hoover windtunnel vacuum cleaner
Follow the steps below to clean the brush roller of your Hoover windtunnel vacuum cleaner . . .
Step 1. Make sure the vacuum cleaner is turned off and un;lugged from the power outlet before you begin the cleaning process.
Step 2. Use the pedal at the bottom of the vacuum cleaner to recline it. Flip the vacuum cleaner over to gain access to the brush roller.
Step 3. Slide the three tabs at the bottom of the vacuum cleaner to unlock the brush roller cover. Take the brush roller cover out of the vacuum cleaner and then set it aside.
Step 4. Take the brush roller out of the vacuum cleaner and then slide it through the vacuum belt. Set the rest of the vacuum cleaner aside.
Step 5. Get a pair of scissors and then use it to cut off any hair or thread that may be stuck on the brush roller. Take the hair or thread out of the brush roller and then throw it away.
Step 6. When it is completely clean, reconnect the brush roller to the vacuum cleaner and then slide it through the vacuum belt.
Step 7. Reconnect the brush roller cover to the vacuum cleaner and then slide the locks to secure it in place properly.
Step 8. Flip the vacuum cleaner over again and then keep it in the upright position.
Step 9. Turn your Hoover windtunnel vacuum cleaner back on and then check if it is working like it is supposed to now.
Hoover Vacuum Cleaner Brush Roller Not Working – Why and How To Fix
If the brush roller of your Hoover vacuum cleaner isn’t working properly, the machine could have one of three problems. Keep on reading to figure out and to solve the problem your Hoover vacuum cleaner has . . .
The brush roller is bad
If the brush roller of your Hoover vacuum cleaner is bad, it won’t be able to spin properly. To solve the problem, you will need to replace the brush roller. Follow the steps below to replace the brush rollers of two different kinds of Hoover vacuum cleaners . . .
How to replace the brush roller of a Hoover air steerable vacuum cleaner
Follow the steps below to replace the brush roller of your Hoover air steerable vacuum cleaner properly . . .
Step 1. Ensure that your vacuum cleaner is turned off and unplugged from the power outlet before you begin the replacement process. Replacing any part of your Hoover air steerable vacuum cleaner when the machine is turned on or plugged into the power outlet can cause electrocution.
Step 2. Flip the vacuum cleaner over to gain access to the brush roller.
Step 3. Get a screwdriver and then use it to take out the three screws at the bottom of the vacuum cleaner holding the brush roller cover in place. Keep the screws in a safe place.
Step 4. Take the brush roller cover out of the vacuum cleaner and then set it aside.
Step 5. Take the old brush roller out of the vacuum cleaner and then slide it through the vacuum belt. Set the brush roller aside.
Step 6. Get a new Hoover vacuum cleaner brush roller of the same kind and put it in the place of the old one. Slide the new brush roller through the vacuum belt.
Step 7. Put the brush roller cover back on and then lock in place using the three screws that you removed earlier.
Step 8. Flip the vacuum cleaner over again and then keep it in the upright position.
Step 9. Turn your Hoover air steerable vacuum cleaner back on and check if it is working like it is supposed to now.
How to replace the brush roller of a Hoover windtunnel vacuum cleaner
Follow the steps below to replace the brush roller of your Hoover windtunnel vacuum cleaner . .
Step 1. Make sure your Hoover vacuum cleaner is turned off and unplugged from the power outlet before you begin the replacement process.
Step 2. Press the pedal at the bottom of the vacuum cleaner to recline it.
Step 3. Flip the vacuum cleaner over to gain access to the brush roller
Step 4. Slide the three locks at the bottom of the vacuum cleaner to unlock the brush roller cover. Take the brush roller cover out of the vacuum cleaner and then set it aside.
Step 5. Take the old brush roller out of the vacuum cleaner and then slide it through the vacuum belt. Set the brush roller aside.
Step 6. Get a new Hoover windtunnel vacuum cleaner brush roller of the same kind and put it in the place of the old one. Slide the new brush roller through the vacuum belt.
Step 7. Put the brush roller cover back on and slide the locks to secure it in place.
Step 8. Flip the vacuum cleaner over again and then let it stand upright.
Step 9. Turn your Hoover windtunnel vacuum cleaner back on and then check if it is working like it is supposed to now.
The vacuum belt is bad
If the brush roller belt of your Hoover vacuum cleaner is bad, the brush roller won’t be able to spin properly. To solve the problem, you will need to replace the brush roller belt. Follow the steps below to replace the brush roller belt of two different kinds of Hoover vacuum cleaners . . . .
How to replace the brush roller belt of a Hoover air steerable vacuum cleaner
Follow the steps below to replace the brush roller belt of your Hoover air steerable vacuum cleaner . . .
Step 1. Turn your vacuum cleaner off and unplug it from the power outlet before you begin. Replacing any part of your Hoover air steerable vacuum cleaner when the machine is plugged into the power outlet can cause electrocution.
Step 2. Flip the vacuum cleaner over.
Step 3. Get a screwdriver and use it to take out the three screws at the bottom of the vacuum cleaner holding the brush roller cover in place. Keep the screws in a safe place.
Step 4. Take the brush roller cover out of the vacuum cleaner and then set it aside.
Step 5. Take the brush roller out of the vacuum cleaner and then slide it through the vacuum belt. Set the brush roller aside.
Step 6. Take the brush roller belt out of the vacuum cleaner and set it aside.
Step 7. Get a new Hoover vacuum cleaner brush belt and put it in the place of the old one.
Step 8. Reconnect the brush roller to the vacuum cleaner and then slide it through the new
vacuum belt.
Step 9. Reconnect the brush roller cover to the vacuum cleaner and then use the screws that you removed earlier to lock it in place properly.
Step 10. Flip the vacuum cleaner over again and then keep it in the upright position.
Step 11. Turn your Hoover air steerable vacuum cleaner back on and check if it is working like it is supposed to now.
How to replace the brush belt of a Hoover windtunnel vacuum cleaner
Follow the steps below to replace the brush belt of your Hoover windtunnel vacuum cleaner . . .
Step 1. Turn your vacuum cleaner off and unplug it from the power outlet before you begin the replacement process. Replacing any part of your Hoover windtunnel vacuum cleaner when the machine is turned on or plugged into the power outlet can cause electrocution.
Step 2. Recline the vacuum cleaner using the pedal at the bottom of the machine.
Step 3. Flip the vacuum cleaner over.
Step 4. At the bottom of the vacuum cleaner, you will see three locks. Unlock them to disconnect the brush roller cover from the rest of the machine.
Step 5. Take the brush roller cover out of the vacuum cleaner and set it aside.
Step 6. Take the brush roller out of the vacuum cleaner and slide it through the vacuum belt. Set the brush roller aside.
Step 7. Take the vacuum belt out of the vacuum cleaner and set it aside.
Step 8. Get a new Hoover windtunnel vacuum cleaner belt of the same kind and put it in the place of the old one.
Step 9. Reconnect the brush roller to the vacuum cleaner and then slide it through the new vacuum belt.
Step 10. Reconnect the brush roller cover to the vacuum cleaner and make sure to lock it in place properly.
Step 11. Flip the vacuum cleaner over again and keep it in the upright position.
Step 12. Turn your Hoover windtunnel vacuum cleaner back on and check if it is working like it is supposed to now.
The brush roller is clogged
If the brush roller of your Hoover vacuum cleaner is clogged, it won’t be able to work properly. To solve the problem, you will need to clean the brush roller. After cleaning the brush roller of your Hoover vacuum cleaner, turn the machine back on and check if it is working like it is supposed to now.
Hoover Vacuum Cleaner Not Working – Why and How To Fix
If your Hoover vacuum cleaner isn’t working, the machine could have one of many problems. Keep on reading to figure out and to solve the problem your Hoover vacuum cleaner might have . . .
The vacuum canister is too full
If the canister of your Hoover vacuum cleaner is too full, the machine won’t be able to work properly. To solve the problem, you will need to empty the vacuum canister. Follow the steps below to empty the canister of two different kinds of Hoover vacuum cleaners . . .
How to empty the canister of Hoover air bagless upright vacuum cleaner
Follow the steps below to empty the canister of your Hoover air bagless upright vacuum cleaner properly . . .
Step 1. Make sure your vacuum cleaner is turned off and unplugged from the power outlet before you begin.
Step 2. Press the button on the handle of the vacuum canister to disconnect it from the vacuum cleaner.
Step 3. Separate the vacuum canister from the vacuum cleaner. Set the rest of the vacuum cleaner aside.
Step 4. Twist the lid of the vacuum canister to disconnect it from the canister.
Step 5. Take the canister out of the vacuum canister and set it aside.
Step 6. Empty the vacuum canister over a trash can.
Step 7. If necessary, wipe the internal part of the vacuum canister with a dry piece of cloth or tissue.
Step 8. When it is completely empty, close the lid of the vacuum canister and twist it to lock it in place properly.
Step 9. Reconnect the vacuum canister to the vacuum cleaner and make sure to lock it in place properly.
Step 10. Turn your Hoover air bagless upright vacuum cleaner back on and you can start cleaning with it again.
How to empty the canister of a Hoover central vacuum cleaner
Follow the steps below to empty the canister of your Hoover central vacuum cleaner . . .
Step 1. Ensure that your vacuum cleaner is turned off and unplugged from the power outlet you start.
Step 2. Unhook then latch on the side of the vacuum cleaner to disconnect the bottom of the machine from the rest of the vacuum cleaner. Take the bottom of the vacuum cleaner out of the rest of the machine and set it aside.
Step 3. Take the canister out of the vacuum cleaner and then set the rest of your machine aside.
Step 4. Open the lid of the vacuum canister and then empty it over a trash can.
Step 5. Wipe the internal part of the vacuum canister with a dry piece of cloth or tissue if necessary.
Step 6. When it is completely empty, reconnect the vacuum canister to the vacuum cleaner and make sure to lock it in place properly.
Step 7. Reconnect the bottom of the vacuum cleaner to the rest of the machine and make sure to lock it in place properly using the latch on the side of the vacuum cleaner.
Step 8. Turn your Hoover central vacuum cleaner back on and check if it is working like it is supposed to now.
The vacuum canister isn’t properly connected to the vacuum cleaner.
If the canister of your Hoover vacuum cleaner isn’t properly connected to the machine, the vacuum cleaner won’t be able to work properly. To solve the problem, disconnect the vacuum canister from the vacuum cleaner and then reconnect it to the machine.
You can tell that the vacuum canister is properly secured when you hear it lock in place with a click. After reconnecting the vacuum canister to the vacuum cleaner properly, turn your machine back on and check if it is working like it is supposed to now.
The filters are dirty
If the filters of your Hoover vacuum cleaner are dirty, the machine won’t be able to work properly. To solve the problem, you will need to clean the vacuum filter. Here’s how to clean the filters of different kinds of Hoover vacuum cleaners.
After cleaning the filter of your Hoover vacuum cleaner, turn the machine back on and check if it is working like it is supposed to now.

The filter is not properly connected to the vacuum cleaner
If the filter of your Hoover vacuum cleaner isn’t properly connected to the rest of the machine, your vacuum cleaner won’t be able to work properly. To solve the problem, you will need to take the filter out of the vacuum cleaner and reconnect it to the machine properly. Follow the steps below to take out the filters of different kinds of Hoover vacuum cleaners . . .
How to take out the filter of a Hoover central vacuum cleaner
Follow the steps below to take out the filter of your Hoover central vacuum cleaner . . .
Step 1. Turn your vacuum cleaner off and unplug it from the power outlet before you begin.
Step 2. Unhook the latch on the side of the vacuum cleaner to disconnect the button of your machine from the rest of the vacuum cleaner. Take the bottom of the machine out of the vacuum cleaner and set it aside.
Step 3. Take the cloth filter out of the vacuum cleaner.
Step 4. Reconnect the cloth filter to the vacuum cleaner and make sure to lock it in place properly.
Step 5. Take the foam filter out of the vacuum cleaner. Reconnect the foam filter to the vacuum cleaner properly.
Step 6. Reconnect the bottom of your machine to the rest of the vacuum cleaner and use the latch to lock it in place properly.
Step 7. Turn your Hoover central vacuum cleaner back on and check if it is working like it is supposed to now.
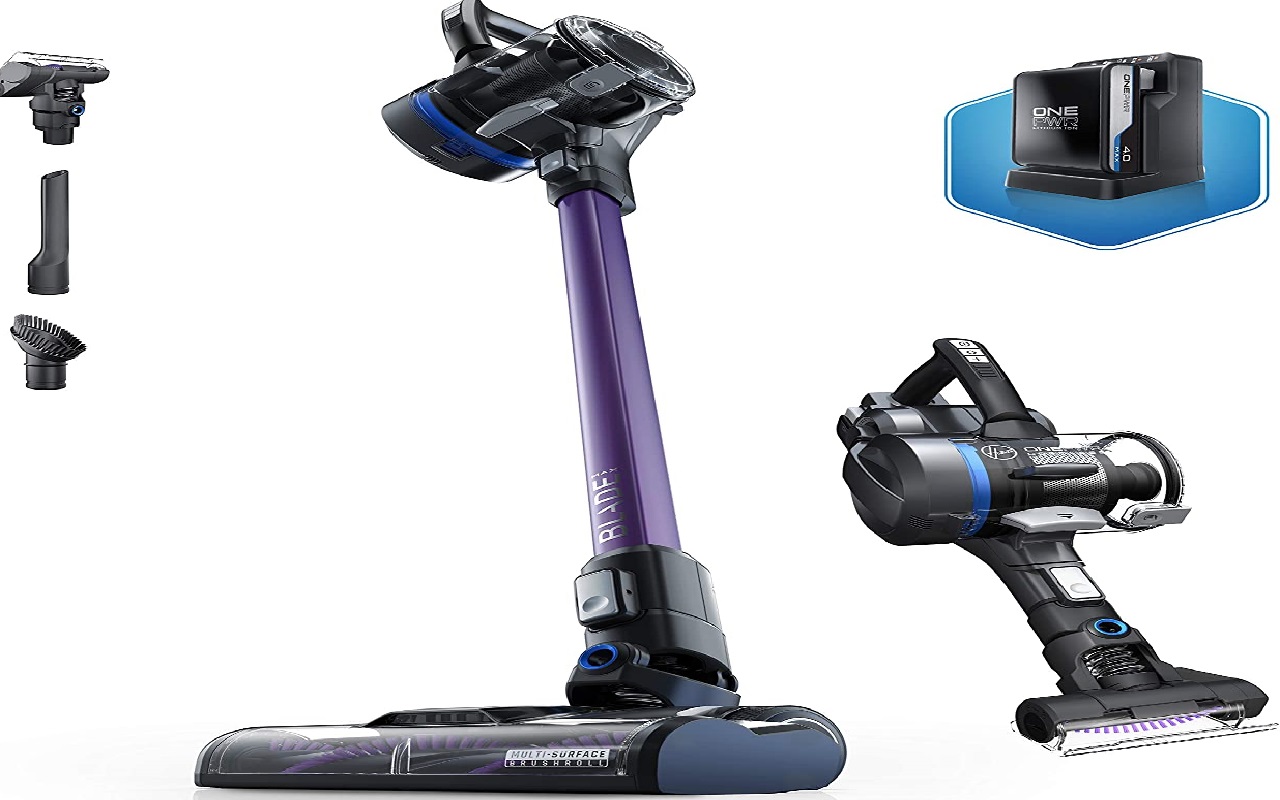
How to take out the filter of a Hoover blade cordless vacuum cleaner
Follow the steps below to gain access to the filter of your Hoover blade cordless vacuum cleaner . . .
Step 1. Make sure your vacuum cleaner is turned off and unplugged from the power outlet before you begin.
Step 2. Disconnect the vacuum canister from the vacuum cleaner. Set the rest of your vacuum cleaner aside
Step 3. Open the ldi of the vacuum canister and then empty it over a trash can.
Step 4. Take the filter out of the vacuum canister.
Step 5. Reconnect the filter to the vacuum cleaner and make sure to lock it in place properly.
Step 6. Turn your Hoover blade cordless vacuum cleaner back on and check if it is working like it is supposed to now.
How to take out the filter of a Hoover windtunnel air bagless upright vacuum cleaner
Follow the steps below to gain access to the filter of your Hoover windtunnel air bagless upright vacuum cleaner . . .
Step 1. Ensure that your vacuum cleaner is turned off and unplugged from the power outlet before you begin.
Step 2. Press the button on the handle of the vacuum canister to disconnect it from the vacuum cleaner.
Step 3. Separate the vacuum canister from the vacuum cleaner and then set the rest of your machine aside.
Step 4. Twist the lid of the vacuum canister to open it. Set the vacuum canister cover aside.
Step 5. Take the filter out of the vacuum canister.
Step 6. Reconnect the filter to the vacuum canister and make sure to lock it in place properly.
Step 7. Reconnect the canister cover to the vacuum canister and twist it to lock it in place properly.
Step 8. Take the second filter out of the vacuum cleaner then make sure to reconnect it to the machine properly.
Step 9. Reconnect the vacuum canister to the vacuum cleaner and make sure to lock it in place properly.
Step 10. Turn your Hoover windtunnel air bagless upright vacuum cleaner back on and check if it is working like it is supposed to now.
How to take out the filter of a Hoover windtunnel 2 rewind bagless upright vacuum cleaner
Follow the steps below to gain access to the filter of your Hoover windtunnel 2 rewind bagless upright vacuum cleaner . . .
Step 1. Always make sure your vacuum cleaner is turned off and unplugged from the power outlet before you start.
Step 2. Disconnect the vacuum canister from the vacuum cleaner. Set the rest of your vacuum cleaner aside.
Step 3. Open the lid of the vacuum canister and then lean it backwards.
Step 4. Take the filter out of the vacuum canister. Reconnect the filter to the vacuum canister properly.
Step 5. Close the lid of the vacuum canister and then reconnect it to the vacuum cleaner. Make sure to lock the vacuum canister in place properly.
Step 6. At the bottom of the vacuum canister, you will see the second filter. Take the filter out of the vacuum cleaner and then reconnect it to the machine properly.
Step 7. Turn your Hoover windtunnel 2 rewind bagless upright vacuum cleaner back on and check if it is working like it is supposed to now.
How to take out the filter of a Hoover windtunnel vacuum cleaner
Follow the step below to gain access to the filter of your Hoover windtunnel vacuum cleaner . . .
Step 1. Turn your vacuum cleaner off and unplug it from the power outlet before you begin.
Step 2. Press the button on the handle of the vacuum canister to disconnect it from the rest of the vacuum cleaner.
Step 3. Separate the vacuum canister from the vacuum cleaner and then set the rest of your machine aside.
Step 4. Open the lid of the vacuum canister and lean it backwards.
Step 5. Take the outer filter out of the vacuum canister lid.
Step 6. Get a screwdriver and use it to take out the screws holding the vacuum canister cover in place. Keep the screws in a safe place.
Step 7. Separate the inner filter from the canister cover and then position it in place properly.
Step 8. Reconnect the inner filter to the canister cover and then put the screws that you removed from the cover earlier back in their places.
Step 9. Reconnect the outer filter to the vacuum canister lid properly.
Step 10. Close the lid of the vacuum canister and then reconnect it to the vacuum cleaner
Step 11. Turn your Hoover windtunnel vacuum cleaner back on and check if it is working like it is supposed to now.
How to take out the filter of a Hoover fusion vacuum cleaner
Follow the steps below to gain access to the filter of your Hoover fusion vacuum cleaner. . .
Step 1. Make sure your machine is turned off and unplugged from the power outlet before you begin.
Step 2. Press the button on the handle of the vacuum canister to disconnect it from the vacuum cleaner. Set the rest of your vacuum cleaner aside.
Step 3. Open the lid of the vacuum canister to gain access to the first filter.
Step 4. Take the big filter out of the vacuum canister.
Step 5. Reconnect the filter to the vacuum canister and make sure to lock it in place properly.
Step 6. Close the lid of the vacuum canister.
Step 7. In the vacuum canister chamber, you will see a smaller filter. Take the filter out of the vacuum cleaner.
Step 8. Reconnect the filter to the vacuum canister chamber and make sure to lock it in place properly.
Step 9. Reconnect the vacuum canister to the vacuum cleaner.
Step 10. Turn your Hoover fusion vacuum cleaner back on and check if it is working like it is supposed to now.
How to take out of the filter of a Hoover reactive pet vacuum cleaner
Follow the steps below to gain access to the filters of your Hoover reactive pet vacuum cleaner . . .
Step 1. Make sure your vacuum cleaner is turned off and unplugged from the power outlet before you start.
Step 2. Press the button on the handle of the vacuum canister to disconnect it from the rest of the vacuum cleaner.
Step 3. Separate the vacuum canister from the vacuum cleaner and set the rest of your vacuum cleaner aside.
Step 4. At the bottom of the vacuum cleaner you will see a filter. Take the filter out of the vacuum cleaner.
Step 5. Reconnect the filter to the vacuum cleaner and make sure to lock it in place properly.
Step 6. Open the lid of the vacuum canister to gain access to the other two filters.
Step 7. Take the foam filter out of the lid of the vacuum canister.
Step 8. Reconnect foam filter to the lid of the vacuum canister and make sure to lock it in place properly.
Step 9. Take the other filter out of the vacuum canister.
Step 10. Reconnect the filter to the vacuum cleaner canister and make sure to lock it in place properly.
Step 11. Close the lid of the vacuum canister and reconnect it to the vacuum cleaner. Make sure to lock it in place properly.
Step 12. Turn your Hoover reactive pet vacuum cleaner backmon and check if it is working like it is supposed to now.
How to take out the filter of a Hoover rush pet vacuum cleaner
Follow the steps below to gain access to the filter of your Hoover rush pet vacuum cleaner . . .
Step 1. Turn your Hoover vacuum cleaner off and unplug it from the power outlet before you begin.
Step 2. Press the button of the vacuum canister to disconnect it from the vacuum cleaner. Separate the vacuum canister from the vacuum cleaner and set it aside.
Step 3. Turn the vacuum cleaner backwards to gain access to the first filter.
Step 4. Take the filter cover out of the vacuum cleaner and set it aside.
Step 5. Take the filter out of the vacuum cleaner.
Step 6. Reconnect the filter to the vacuum cleaner and make sure to lock it in place properly.
Step 7. Open the lid of the vacuum canister to gain access to the second filter.
Step 8. Take the filter out of the vacuum canister.
Step 9. Reconnect the filter out the vacuum canister and make sure to lock it in place properly.
Step 10. Close the lid of the vacuum canister and then reconnect it to the vacuum cleaner. Make sure to lock the vacuum canister in place properly.
Step 11. Turn your Hoover rush pet vacuum cleaner back on and check if it is working like it is supposed to now.
How to take out the filter of a Hoover hurricane pet vacuum cleaner
Follow the steps below to gain access to the filter of your Hoover hurricane pet vacuum cleaner . .
Step 1. Turn your vacuum cleaner off and unplug it from the power outlet before you start.
Step 2. Press the button behind the vacuum canister to disconnect it from the vacuum cleaner.
Step 3. Separate the vacuum canister from the vacuum cleaner and then set it aside.
Step 4. In the vacuum canister chamber, you will see the first filter. Take the filter out of the vacuum canister chamber.
Step 5. Reconnect the filter to the canister chamber and make sure to lock it in place properly.
Step 6. Open the lid of the vacuum canister to gain access to the second filter and the third filter. Empty the vacuum canister over a trash can.
Step 7. Take the second filter out of the vacuum canister lid.
Step 8. Reconnect the second filter to the vacuum canister lid and make sure to lock it in place properly.
Step 9. Take the third filter out of the vacuum canister. Reconnect the filter to the vacuum canister and make sure to lock it in place properly.
Step 10. Close the lid of the vacuum canister and then reconnect it to the vacuum cleaner. Make sure to lock the vacuum canister in place properly.
Step 11. Turn your Hoover hurricane pet vacuum cleaner back on and check if it is working like it is supposed to now.
How to take out the filter of a Hoover sprint stick cordless vacuum cleaner
Follow the steps below to gain access to the filter of your Hoover sprint stick vacuum cleaner . .
Step 1. Always make sure your vacuum cleaner is turned off and unplugged from the power outlet before you begin.
Step 2. Disconnect the vacuum canister from the vacuum cleaner to gain access to the two filters. Set the rest of your vacuum cleaner aside.
Step 3 Open the lid of the vacuum canister and then empty it over a trash can.
Step 4. Twist the two filters counter clockwise to disconnect them from the vacuum canister.
Step 5. Reconnect the filters to the vacuum canister and twist them to lock them in place properly.
Step 6. Close the lid of the vacuum canister and then reconnect it to the vacuum cleaner. Make sure to lock the canister in place properly.
Step 7. Turn your Hoover sprint stick cordless vacuum cleaner back on and check if it is working like it is supposed to now.
How to take out the filter of a Hoover freedom stick vacuum cleaner
Follow the steps below to gain access to the filter of your Hoover freedom stick vacuum cleaner . . .
Step 1. Make sure your Hoover vacuum cleaner is turned off and unplugged from the power outlet before you start.
Step 2. Disconnect the vacuum hose from the vacuum cleaner. Set the vacuum hose aside.
Step 3. Flip the vacuum cleaner over.
Step 4. To gain access to the filters, you will need to disconnect the vacuum canister from the vacuum cleaner. Press the button at the bottom of the vacuum cleaner to disconnect the vacuum canister from the rest of the machine.
Step 5. Separate the vacuum canister from the vacuum cleaner and set it aside.
Step 6. Twist the mesh filter counterclockwise to disconnect it from the vacuum cleaner.
Step 7. Reconnect the filter to the vacuum cleaner and make sure to lock it in place properly.
Step 8. Reconnect the vacuum canister to the vacuum cleaner and make sure to lock it in place properly.
Step 9. Flip the vacuum cleaner over again.
Step 10. Turn your Hoover freedom stick vacuum cleaner back on and check if it is working like it is supposed to now.
How to take out the filter of a Hoover unplugged cordless stick vacuum cleaner
Follow these steps below to gain access to the filter of your Hoover unplugged cordless stick vacuum cleaner . . .
Step 1. Ensure that your vacuum cleaner is turned off and unplugged from the power outlet before you start.
Step 2. Press the button at the bottom of the vacuum canister to disconnect it from the vacuum cleaner.
Step 3. Separate the vacuum canister from the vacuum cleaner. Set the rest of the vacuum cleaner aside.
Step 4. Take the inner filter and the outer filter out of the vacuum canister.
Step 5. Reconnect the inner filter and the outer filter to the vacuum canister and make sure to lock them in place properly.
Step 6. Reconnect the vacuum canister to the vacuum cleaner and make sure to lock it in place properly.
Step 7. Turn your Hoover unplugged cordless stick vacuum cleaner back on and check if it is working like it is supposed to now.
How to take out the filter of a Hoover 14 4v free motion handstick vacuum cleaner
Follow the steps below to gain access to the filter of your Hoover 14 4v free motion handstick vacuum cleaner . . .
Step 1. Make sure your vacuum cleaner is turned off and unplugged from the power outlet before you start.
Step 2. Press the button above the vacuum canister to disconnect it from the vacuum cleaner.
Step 3. Separate the vacuum canister from the vacuum cleaner. Set the rest of the vacuum cleaner aside.
Step 4. Separate the canister cover from the vacuum cleaner canister. Set the vacuum canister cover aside.
Step 5. Take the filter out of the vacuum canister.
Step 6. Reconnect the filter to the vacuum cleaner canister and make sure to lock it in place properly
Step 7. Reconnect the canister lid to the vacuum canister.
Step 8. Reconnect the vacuum canister to the vacuum cleaner and make sure to lock it in place properly.
Step 9. Turn your Hoover 14 4v free motion handstick vacuum cleaner back on and check if it is working like it is supposed to now.
How to take out of the filter of a Hoover 22v freedom plus vacuum cleaner
Follow the steps below to gain access to the filter of your Hoover 22v freedom plus vacuum cleaner . . .
Step 1. Turn your Hoover vacuum cleaner off and unplug it from the vacuum cleaner before you start.
Step 2. Flip the vacuum cleaner over.
Step 3. Empty the vacuum canister over a trash can and then disconnect it from the vacuum cleaner. Set the vacuum canister aside.
Step 4. Disconnect the first filter from the vacuum cleaner.
Step 5. Reconnect the filter to the vacuum cleaner and make sure to lock it in place properly.
Step 6. Reconnect the vacuum canister to the vacuum cleaner. Flip the vacuum cleaner over again.
Step 7. Turn the vacuum cleaner backwards to again access to the second filter
Step 8. Take the filter out of the back of the vacuum cleaner.
Step 9. Reconnect the filter to the back of the vacuum cleaner and make sure to lock it in place properly
.
The vacuum battery is too low
If the battery of your Hoover vacuum cleaner is too low, the machine won’t be able to work properly. To solve the problem, you will need to charge the vacuum battery. Here’s how to charge the battery of a Hoover vacuum cleaner.
After cleaning the battery of your Hoover vacuum cleaner, turn the machine back on and check if it is working like it is supposed to now.
The battery is overheating
If the battery of your Hoover vacuum cleaner is overheating, the machine won’t be able to work properly. To solve the problem, turn the vacuum cleaner off and leave it to cool down for about an hour.
After leaving it to cool down for a while, turn your Hoover vacuum cleaner back on and check if it is working like it is supposed to now.
The battery is bad
If the battery of your Hoover vacuum cleaner is bad, the machine won’t be able to work properly. To solve the problem, you will need to replace the vacuum battery. Here’s how to replace the battery of a Hoover vacuum cleaner.
After replacing the battery of your Hoover vacuum cleaner, turn the machine back on and check if it is working like it is supposed to.